Intro to Staging
You can create a staging environment of any of your applications. Each application supports up to 2 staging sites.

Create a staging environment
- Go to your TXP dashboard
- Click on the application you want to create a environment site for.
- Click on "Staging" in the expanded environment menu in the sidebar.
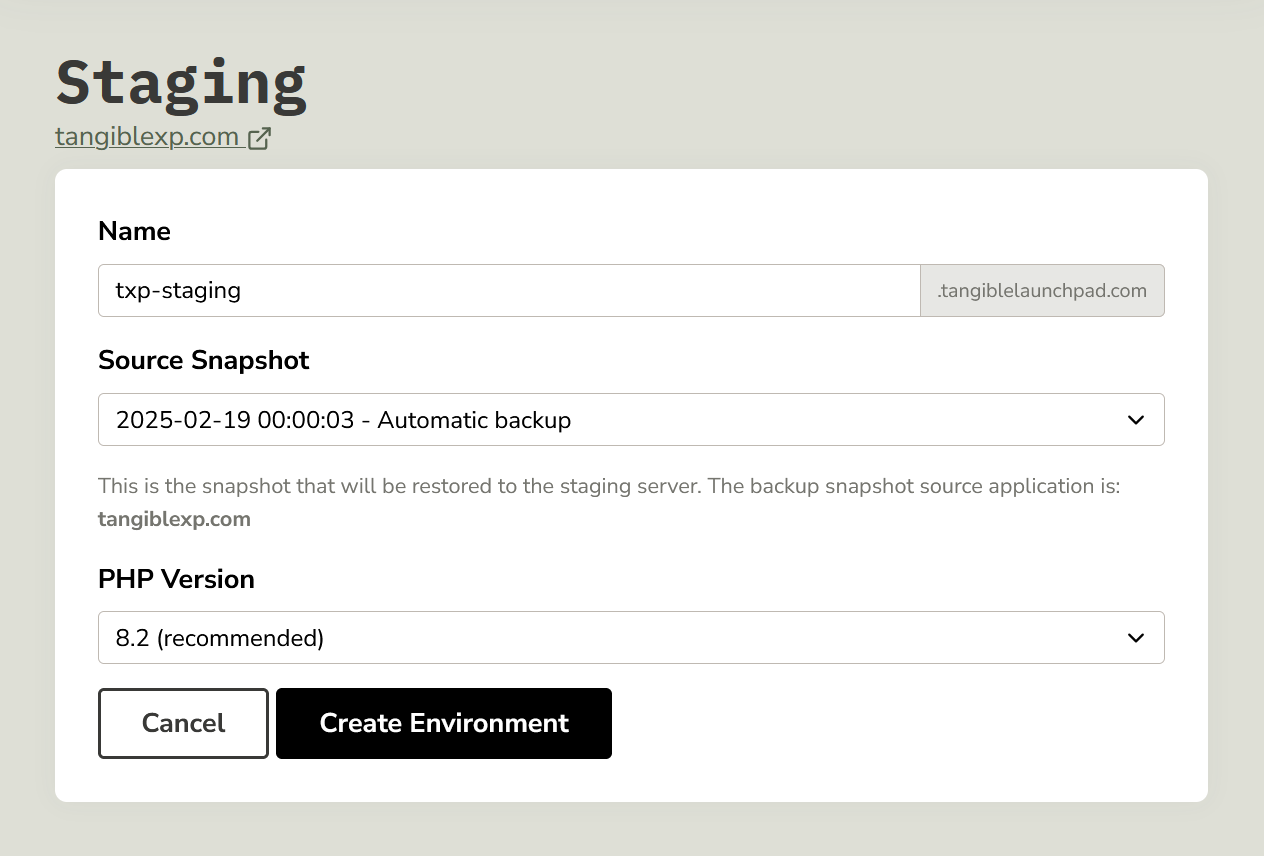
- Click on "Create Environment".
- Enter the name of the domain you want to use for your staging environment. Whatever you choose will be followed by .tangiblelaunchpad.com. You may want to include "staging" or "development" in your staging name, as some plugins ignore these domains when validating license keys.
- Choose a snapshot from one of the backups of your site, this will be used to create your staging site. If you don't select a snapshot, it will automatically use the latest version of your site.
- Select the verison of PHP you want to use for this staging environment from the list of available PHP versions.
- Click "Create Environment" to confirm your choices.

Accessing staging environments
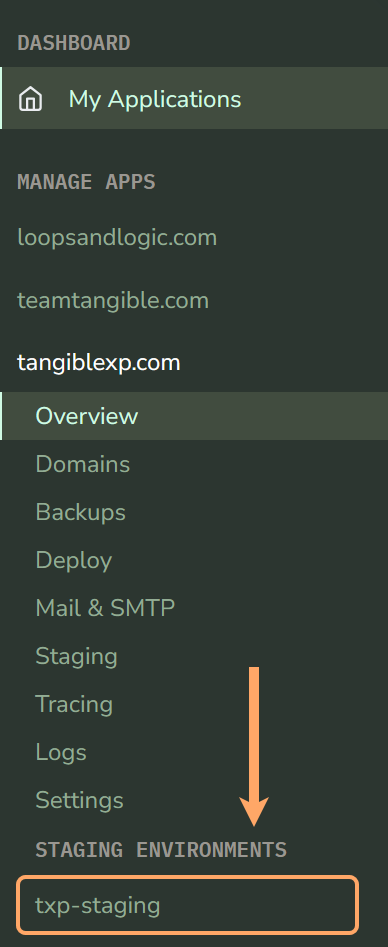
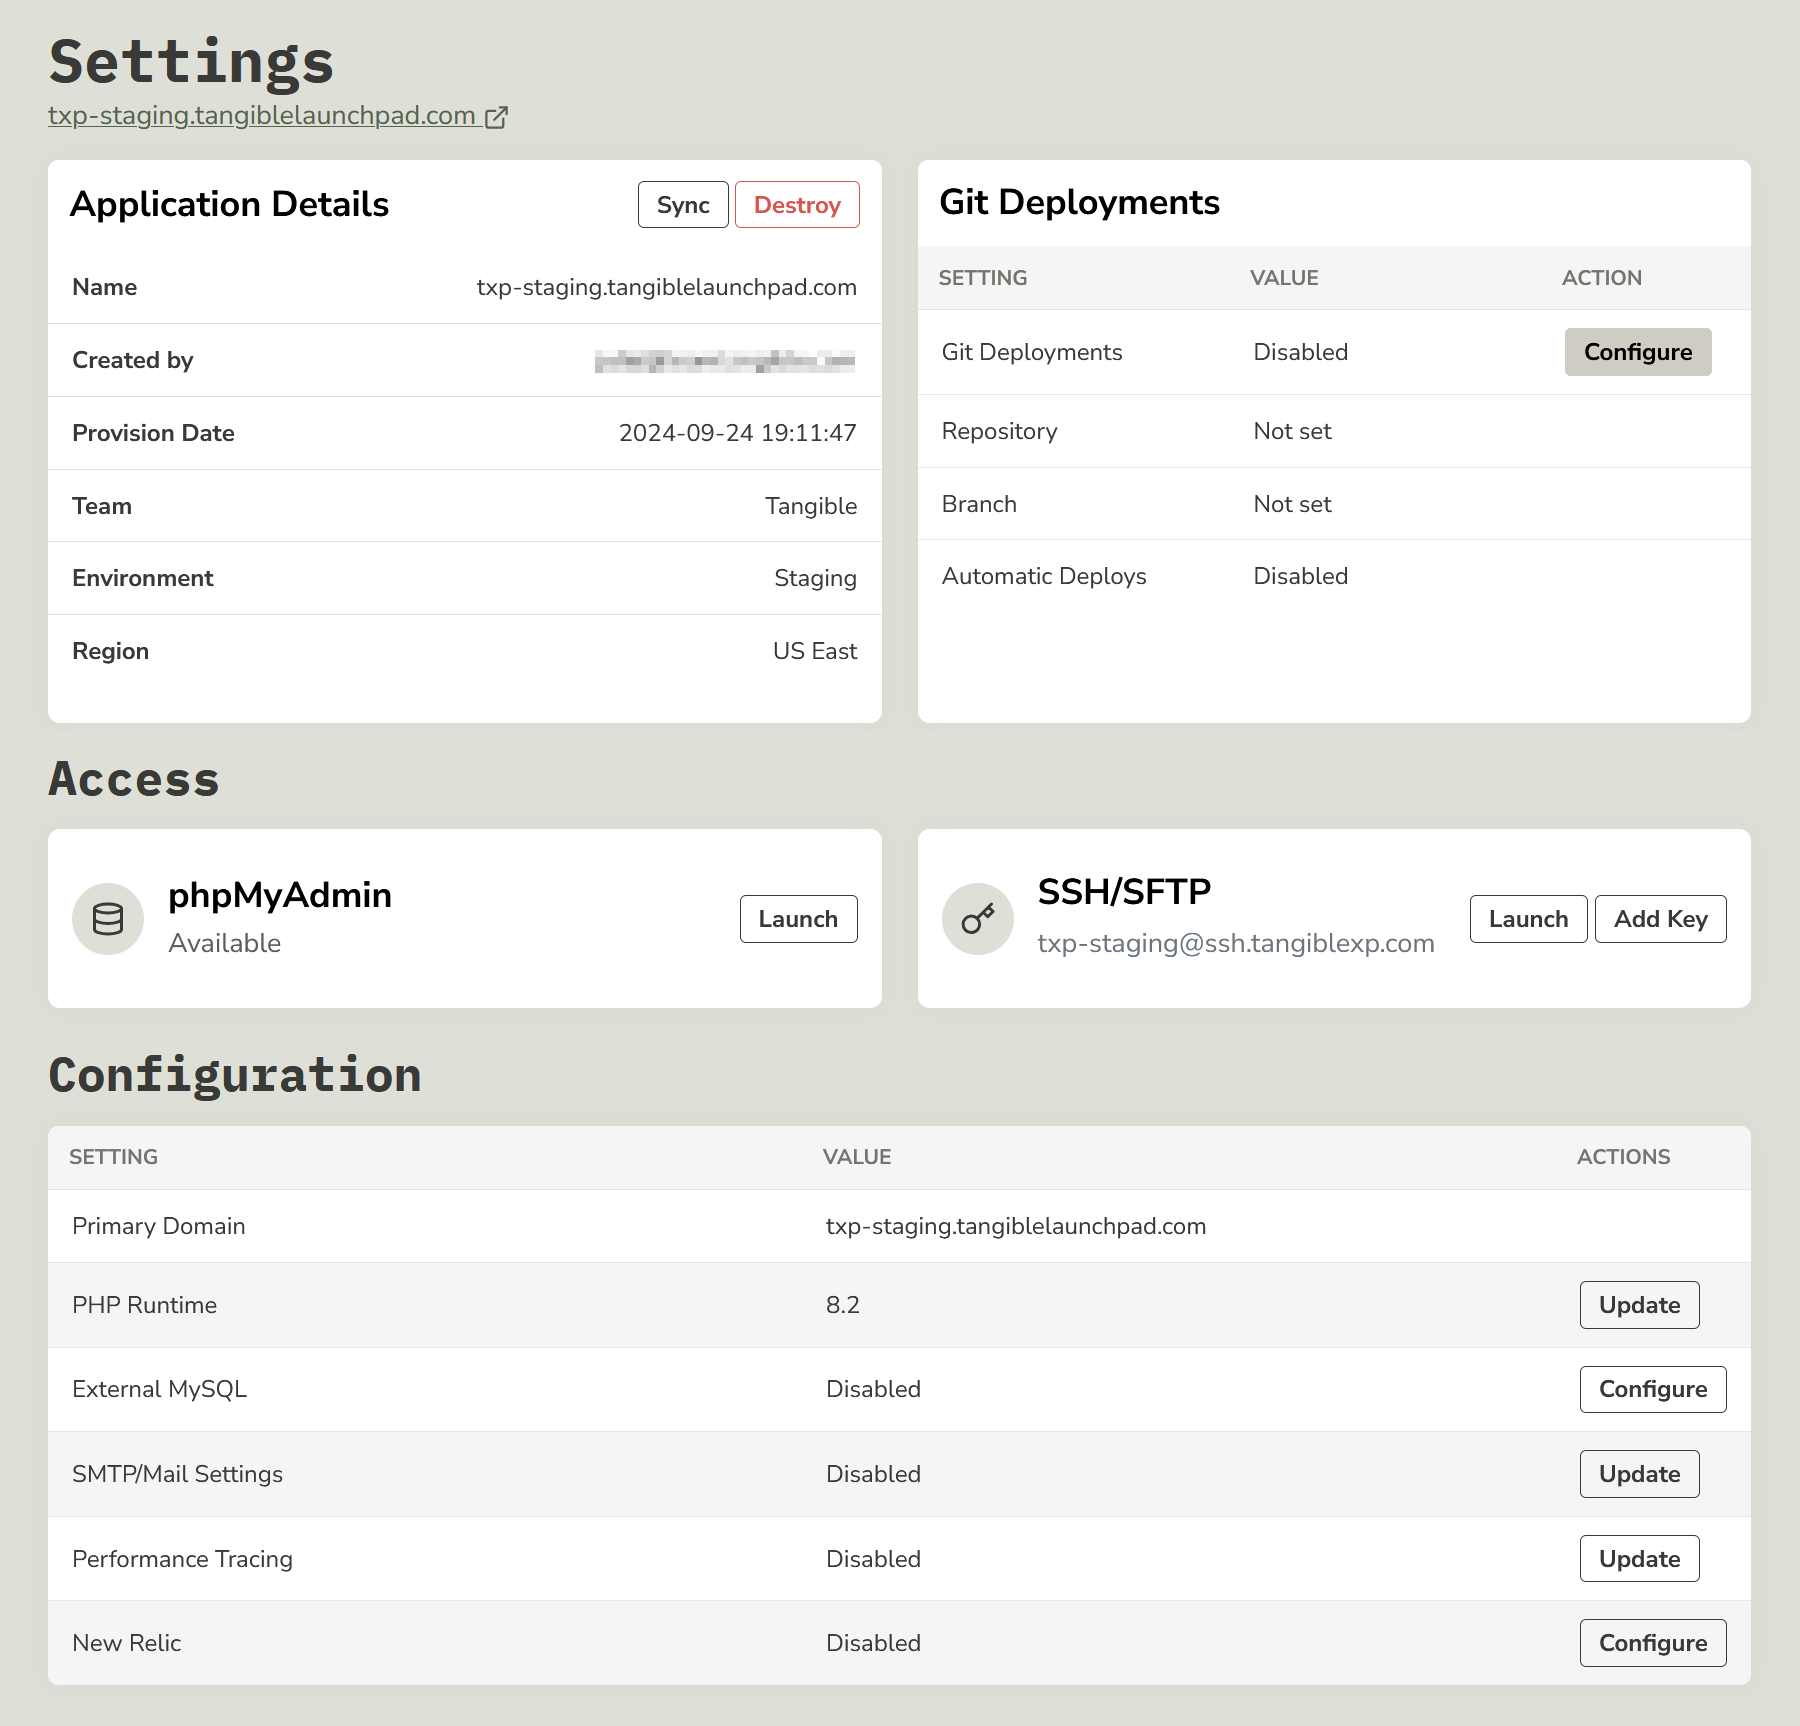
The panel for a staging environment, once it's been created, can be navigated to using the inset navigation below your environment in the sidebar. The URL for your staging site can be found at the top of the settings panel you'll land on.

Clicking the staging environment name will navigate you to the environment settings panel, which lists environment setting values, provides an interfaces for modifying the active PHP version and destroying the environment, and provides links to access phpMyAdmin, SMTP/Mail Settings, and Performance Tracing settings.

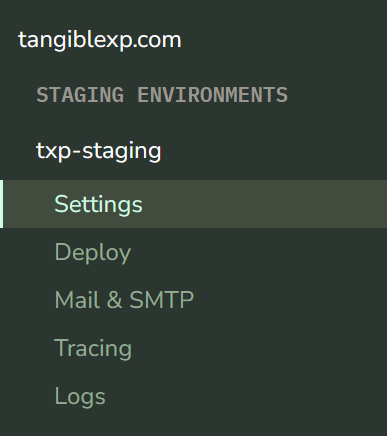
Once you've clicked a staging environment in the sidebar, additional navigation options for the environment will become available.
