Connecting Your Domain to TangibleXP
Every TangibleXP application comes with a temporary domain (yourapp.tangiblelaunchpad.com) for use during setup. When you're ready to go live, you'll connect your own domain.
This page covers:
- Adding your domain in the TXP dashboard
- Configuring your DNS records to point your domain to TXP
- Setting your domain as the primary address for your application
We recommend Cloudflare for DNS — it's free, and it handles both standard subdomains and apex (root) domains without extra plugins or workarounds. The steps below are written for Cloudflare, but the same record types apply to any DNS provider.
Before you begin
You'll need:
- A domain registered with a domain registrar (e.g. Namecheap, GoDaddy, Squarespace Domains)
- Access to your DNS settings — if you're using Cloudflare, this is your Cloudflare dashboard
- An existing application on TangibleXP
If you're in the process of migrating an existing site to TXP, complete the migration steps before setting up your domain. Domain setup is the last step of any migration.
Step 1: Add your domain in the TXP dashboard
Before configuring DNS, register your domain with TangibleXP so the platform knows to route traffic to your application once the DNS change takes effect.
- Go to app.tangiblexp.com and open your application.
- Click Domains in the sidebar.
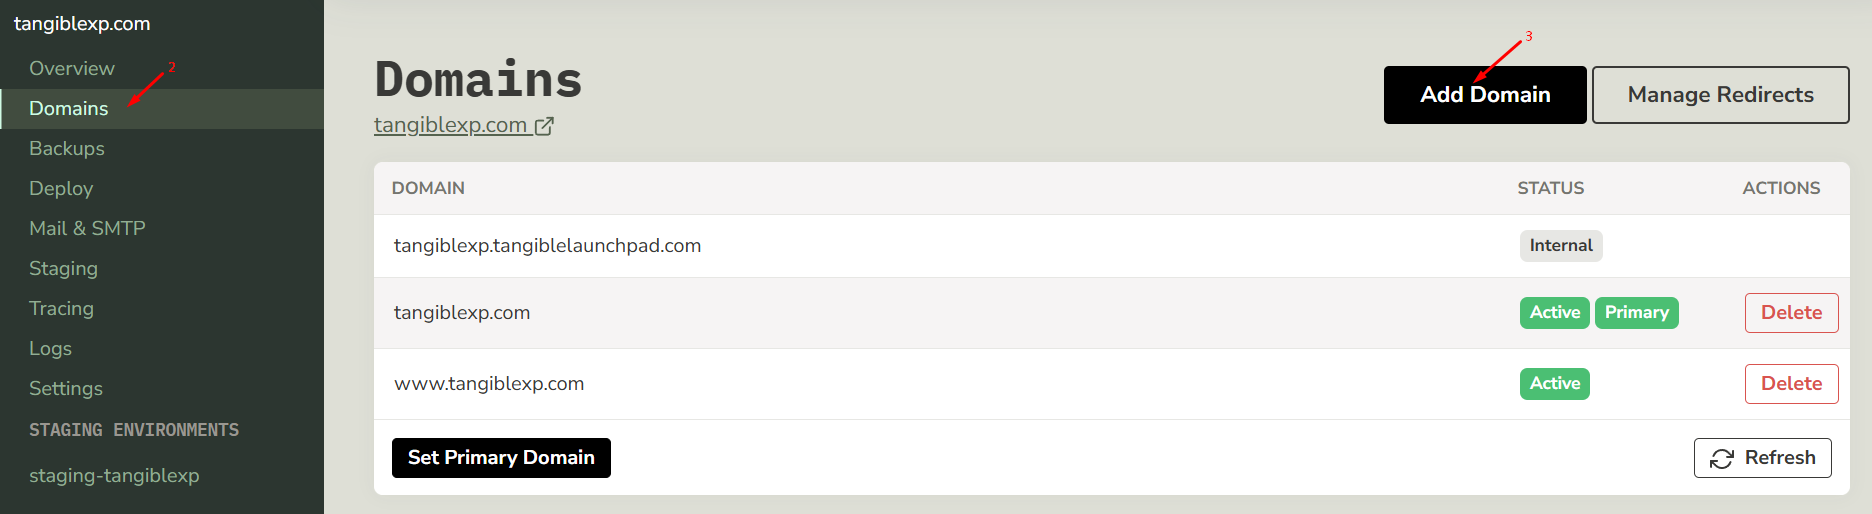
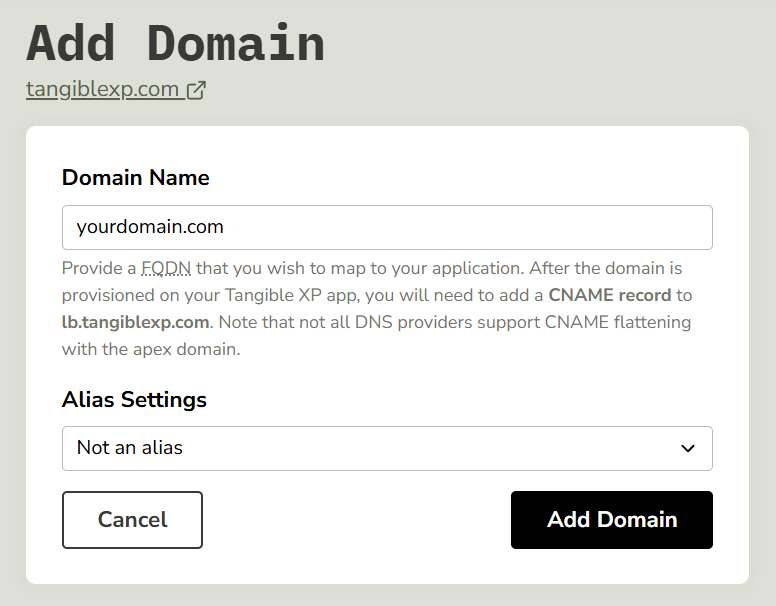
- Click Add Domain.
- Enter the domain you want to use — for example,
www.yourdomain.comoryourdomain.com— and save.
Your domain is now registered with TXP. Traffic won't route to your application yet — that happens once your DNS records are in place.
Step 2: Configure your DNS records
How you set up DNS depends on the type of domain you're pointing at TXP:
- Subdomain — e.g.
learn.yourdomain.comorapp.yourdomain.com— uses a standard CNAME record - Apex domain — e.g.
yourdomain.comwith no prefix, also called a root domain — uses Cloudflare's CNAME flattening
Both are covered below.
Setting up a www redirect? If you want www.yourdomain.com to redirect to your apex domain (or vice versa), add both domains to your TXP application and set up a Domain Alias Redirect in the TXP dashboard. See Redirect Rules for instructions.
Subdomain
- Log in to Cloudflare and select your domain.
- Click DNS in the sidebar, then click Add record.
- Set the record type to CNAME.
- In the Name field, enter the subdomain prefix — for example,
learnforlearn.yourdomain.com. - In the Target field, enter
lb.tangiblexp.com. - Set the proxy status. Both DNS only (grey cloud) and Proxied (orange cloud) work with TangibleXP. If you enable the proxy, your Cloudflare account's cache and security settings will apply before traffic reaches TXP — this gives you additional control but can introduce conflicts if misconfigured.
- Click Save.

Apex domain (root domain)
A standard CNAME record can't be placed at the apex (yourdomain.com with no prefix) — this is a DNS limitation. Cloudflare works around it with CNAME flattening, which lets you use a CNAME at the root and handles the resolution automatically.
- Log in to Cloudflare and select your domain.
- Click DNS in the sidebar, then click Add record.
- Set the record type to CNAME.
- In the Name field, enter
@. Cloudflare uses@to represent the apex domain. - In the Target field, enter
lb.tangiblexp.com. - Set the proxy status. Both DNS only (grey cloud) and Proxied (orange cloud) work with TangibleXP. If you enable the proxy, your Cloudflare account's cache and security settings will apply before traffic reaches TXP — this gives you additional control but can introduce conflicts if misconfigured.
- Click Save.

Using a different DNS provider? Most providers support CNAME records for subdomains. For apex domains, you'll need one that supports CNAME flattening or ALIAS/ANAME records. If your current provider doesn't offer this, migrating your DNS to Cloudflare is free and won't affect your registrar.
Step 3: Set your domain as primary
With the domain added to TXP and your DNS records configured, set it as the primary address for your application.
- In your TXP dashboard, go to Domains for your application.
- Find the domain you added and click Change Primary.
- Select your new domain and confirm.
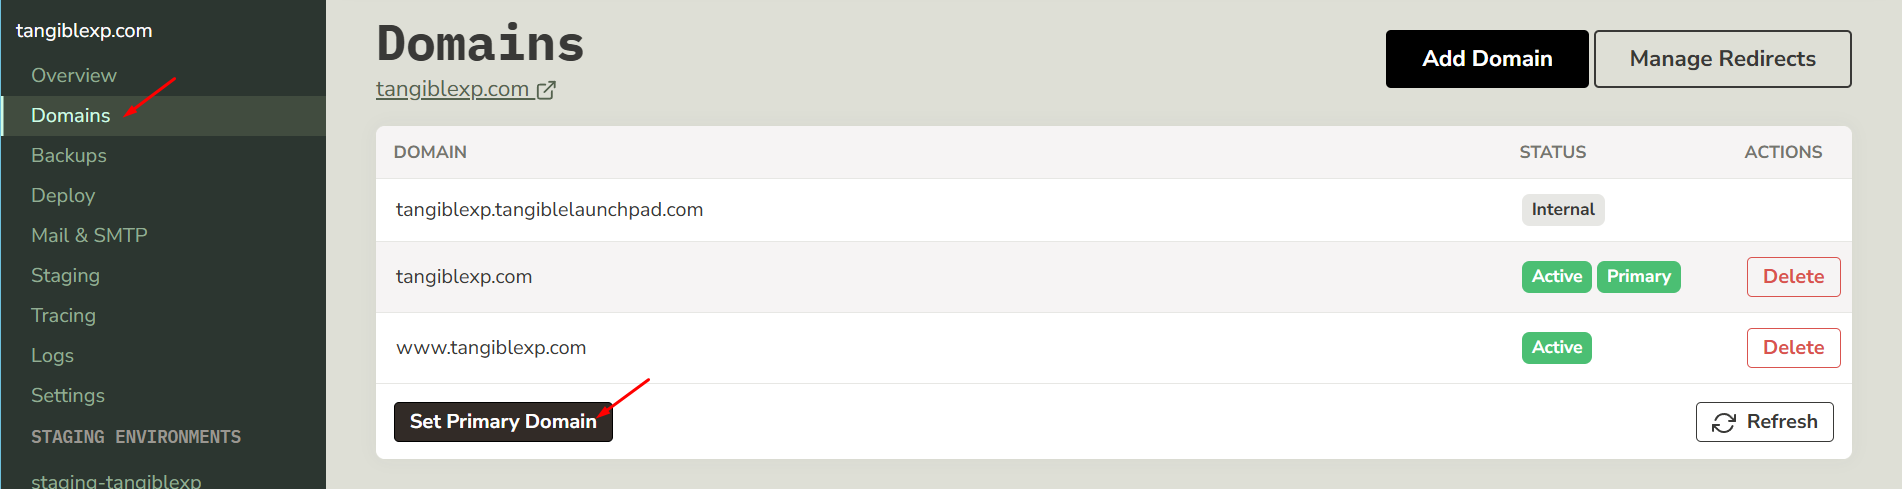
Your application now serves traffic on your own domain.
Waiting for DNS to propagate
DNS changes don't take effect instantly. Updates typically propagate within a few minutes to a few hours, though in rare cases it can take up to 24 hours. During this window, some visitors may still see the old domain or a connection error — this is normal.
To check whether your DNS change has taken effect, use whatsmydns.net: enter your domain, select CNAME, and check whether the record is resolving to lb.tangiblexp.com globally.